Make an encrypted USB with VeraCrypt
Last week we have talked about encryption and a solution for Linux users. This time, we will cover an Free and Open Source solution that works for everyone: Windows, MacOS and Linux users: VeraCrypt. In this guide we will encrypt your USB stick step by step, so you can hide your secrets and use it securely across different devices.
Warning: remember the password
I have already updated last week post with a warning. It seems trivial but I do not want to be responsible of any data loss :D
The truth is this if you forget your password, your files are gone. You will not able to reset your password and wait for an email to come to your Inbox so you can click a direct link to reset everything like magic. Once you encrypt your files with a key, you will can only change your password if you know your previous password.

Searching for your forgotten password. [src:giphy.com]
No problem! Right? At this point you already know you can use a password manager to store your passwords so you do not forget them. Anyway, you can always create a backup of your files in a different (encrypted) drive that you keep at home. In case you forget the password, you can go for your backup.
What is VeraCrypt?
VeraCrypt is a Free and Open Source software solution for disk encryption. It is based on a previous existing project named Truecrypt that is no longer mantained. Nowadays, VeraCrypt is mostly maintained by the IDRIX group.
Why choosing VeraCrypt? Here are two advantages:

VeraCrypt is compatible with Linux, Windows and MacOS.
Compatibility
VeraCrypt is compatible with Windows, MacOS and Linux. This is a great advantage as you can use it across devices and Operating Systems. You can check their supported OS on their website.
When I once asked one of my (a bit paranoid) Linux Hardening teachers, he answared me with this question: “What is the point of encrypting your USB if you are going to mount it in Windows anyway?” :D
Open Source
The tool is maintained by a community of cryptography experts, it is open to the public and you will never depend on a company changing the price or the software. Moreover, you can trust that many people is reviewing the code and it just does what it says it does. If the code is proprietary and closed source, nobody can verify what the application is doing.
The source code is available in Github.
Get on with it: VeraCrypt
The next part of the article is about encrypting your USB stick. Keep in mind that VeraCrypt has also other functionalities like encrypting your Windows installation drive, so feel free to check their project and their documentation. Once you encrypt your USB, you can use it normally after mounting it with VeraCrypt.
For this tutorial, we will use Windows 10. However, the steps are very similar for other OS. Remember it is also compatible with Linux, MacOS and even RaspberryPi!
Install VeraCrypt
For creating the encrypted USB and for using it, you need the VeraCrypt desktop application. You can download it from their website and verify their PGP signature:
- Download it: https://www.veracrypt.fr/en/Downloads.html
- (Optional) Verify the PGP signature: https://www.veracrypt.fr/en/Digital%20Signatures.html
- Launch the installer
Create a new encrypted volume
Once you have installed VeraCrypt, it is time to get your USB stick. Fistly, we will see how to create an encrypted partition with an empty USB stick. If you already have files on it, you can copy them to a temporary folder or you can encrypt the device with them inside.
- Click on Create Volume and choose Encrypt a non-system partition/drive.
- Choose the Create encrypted volume and format it. This will create a new partition in the USB stick.
- Continue with defaults and set a password.
- Choose the format and encrypt your drive. I recommend choosing FAT so it is compatible across devices.
- Click Format and you are done!
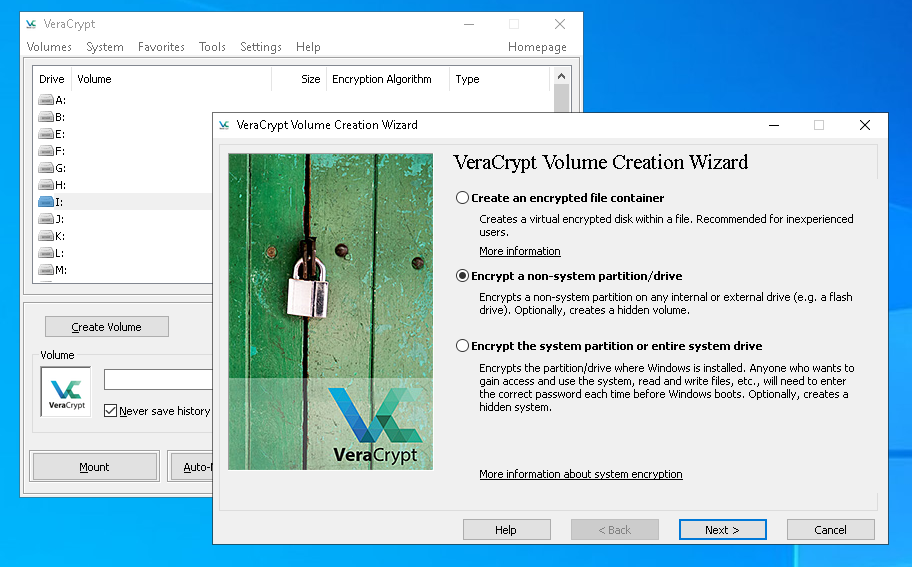
Step 1: Create Volume.
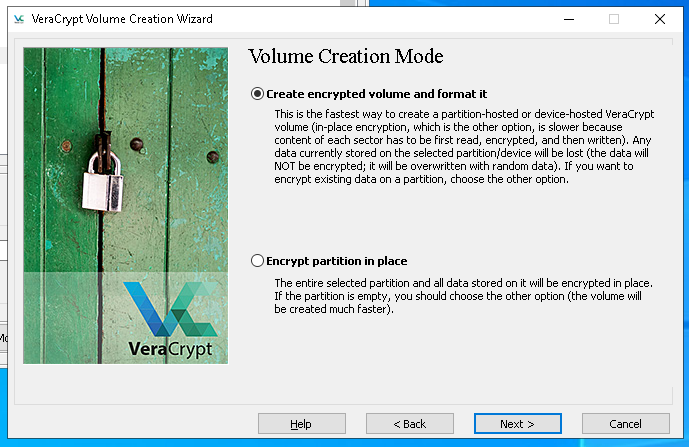
Step 2: Volume creation mode.
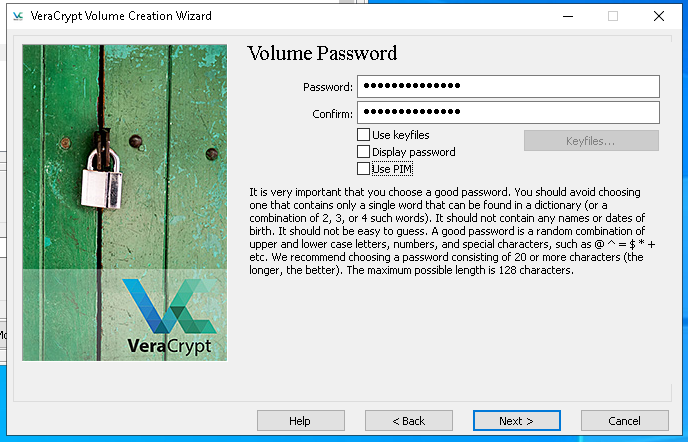
Step 3: Set the password.

Step 4: Choose Volume Format.
Extra: Encrypting an existing NTFS partition
As said, if you already have a NTFS partition with files, you can use VeraCrypt to directly encrypt the partition with the files inside. For this you just have to replace step 2 choosing Encrypt partition in place.
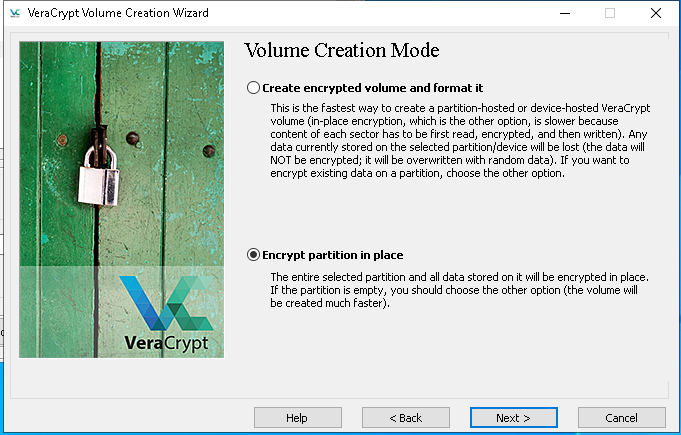
Alternative step 2: Volume creation mode with an existing NTFS partition.
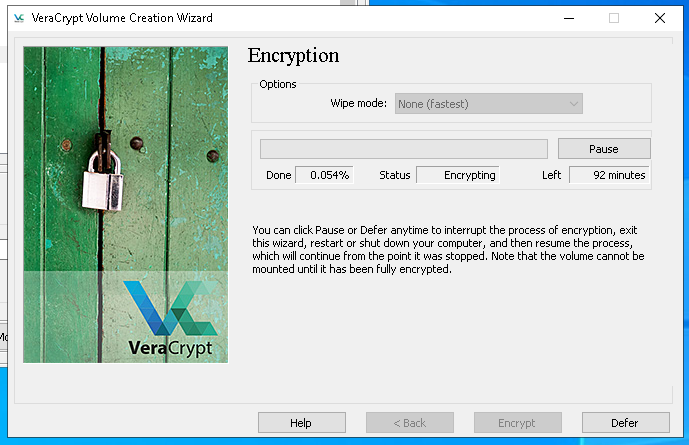
Encryption process when using an existing NTFS partition.
Now what? Use the encrypted USB
Now you have your encrypted USB, you have to unlock it with VeraCrypt. This is easy:

Select your encrypted USB.
- Open Veracrypt
- Select your device and choose a letter you want to assign
- Click on Mount
- Type your password
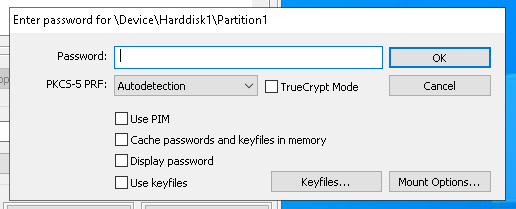
Type your password.
Conclusion
VeraCrypt is a good solution for encrypting your drives. The advantages we have seen here make you able to use it for free and across devices. Moreover, it is easy to use through its GUI. I see a problem, though: no Operating System has native support for VeraCrypt, so you will have to install the application in every device you want to use your USB stick.
Obri! Thank you for reading this post. I hope I made you check the VeraCrypt project.